Being an Oracle database application developer, we come across a lot of client tools like SQL*Plus, SQL Developer, TOAD, PL/SQL Developer etc. In this post I will be explaining the most common settings and FAQ about PL/SQ Developer. It is a nice GUI based client tool which makes life of a developer quite easy, but remember, “Only if you know how to use the tool”.
1. How to view the output from DBMS_OUTPUT.PUT_LINE.
While working in a SQL Window, you would see tabs on top, SQL, Output and Statistics. All the output from the DBMS_OUTPUT.PUT_LINE procedure is displayed in the Output tab.
If you are wondering why you do not see an output? That’s because you did not select the “Enabled” checkbox.
Just select the checkbox and re-execute your code.
 2. Customizing the object browser

3. How to indent and format the code using PL/SQL Beautifier.
This is a very important tool which makes the code formatting and indentation quite handy. All you need to do is customize the settings the way you want your code to be formatted. The red error points to the PL/SQL Beautifier button.

To save your format and indentation setting, follow these steps :
a. Go to Tools –> Preferences

b. Select PL/SQL Beautifier under User Interface

c. Click on Edit.

d. Make changes and then click on Save As.

Code before and after using PL/SQL Beautifier :

4. PLAN_TABLE
Most of the GUIs are helpful to a certain extent and create the PLAN_TABLE in a local schema if it doesn’t exist there without noticing that there is a synonym to a shared PLAN_TABLE. Developers using GUIs often run into trouble and complain about “PLAN TABLE doesn’t exist”. What does it mean? It could be following reasons:
a. PLAN_TABLE doesn’t exist in your schema. So you need to create it first in your schema.
SQL> @?/rdbms/admin/utlxplan.sql

Table created.
This tool doesn’t have the capability to do certain things for you through preferences and settings, so we need to do them manually.
Now we have to create a plan_table synonym, either private or public.
b. Another possible reason is that, the plan table generated by the tool in the current schema is an older version of itself, hence it creates an older version of the plan_table. So first thing is to drop this old version of plan table and create it as mentioned above.
c. If you do not have CREATE privileges, it is certainly NOT the tool’s issue. You have to create the plan table in a different schema and create a synonym, either public or private as mentioned above.
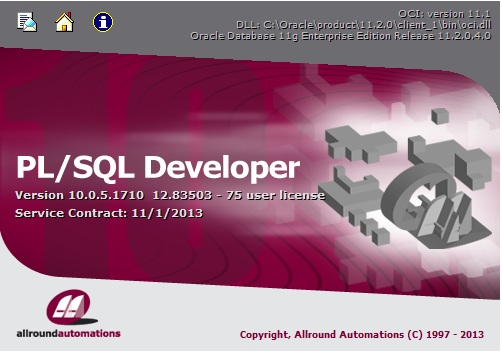
5. How to check the PLSQL Developer Version and other details :
a. Go to Help –> About

b. It will open a pop-up window.
6. NLS Options
One of the most common issues is with the improper settings of NLS parameters. Questions like
“But my date format is not correct” OR “I do not see the time part”
Such questions are all related to the NLS Options. All you need to do is, set the NLS settings properly per your environment needs.
We have 3 options for the DATE, TIME and NUMBER formats.
a. User defined
b. Windows format
c. Oracle format
For all the three formats, only ALTER SESSION statement and session level format mask using SQL can override. Else, the output will be displayed per the NLS settings of the client tool.
Let’s see,
User complaints that he gets output of “SELECT TRUNC(SYSDATE) FROM DUAL” as DD-MM-YYYY,

However desired format is MM/DD/YYYY.
It is due to the following settings of DATE.

User then changes it to Oracle format which is as defined by the Oracle environment (NLS_DATE_FORMAT). OR user defined as MM/DD/YYYY and gets the output displayed as required.

Play around with the NLS options for more understanding.
- Read the following links for further clarity,
A good explanation by Ed Stevens about common myths about NLS DATE format, settings and precendence order. http://edstevensdba.wordpress.com/2011/04/07/nls_date_format/
- Nice demonstration about DATE, TIMESTAMP and INTERVALS by Tim Hall. http://www.oracle-base.com/articles/misc/oracle-dates-timestamps-and-intervals.php
7. Help and User Guide
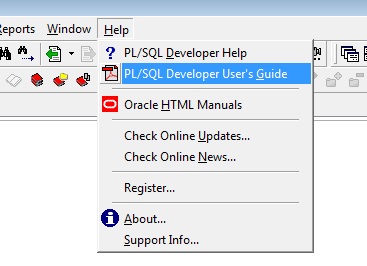
On clicking the User Guide, it will open a PDF file containing the help contents and user guide. It has lot of contents which covers the different aspects of the tool.
8. PL/SQL Developer online-forum
For any question regarding the product or any difficulties, you could also post your question in the online forum here –> http://www.allroundautomations.com/plsqldev.html
9. EXPLAIN PLAN preferences
There are lots of questions on explain plan like,
a. I don’t see ACCESS PREDICATES in the explain plan window
b. How to include FILTER PREDICATES in the explain plan
c. How to configure the EXPLAIN PLAN window
To get rid of such issues, all we need to do is, set the explain plan window preferences.
Before setting the required preferences:
It could be done in either of these 3 ways :
- Go to, Tools –> Preferences –> Window Types –> Plan Window
- Open explain plan window, on the bar you would see an icon at right end which looks like a spanner, click on it.
- In your SQL window, the way you execute your SQL, press F5, it will open explain plan window, then follow step 2.
Following the steps will point to the Preferences window. Using the right arrow, select the required columns from “Available column” and move them to “Selected columns”.

How to set the explain plan preferences:
It could be done in either of these 3 ways :
- Go to, Tools –> Preferences –> Window Types –> Plan Window
- Open explain plan window, on the bar you would see an icon at right end which looks like a spanner, click on it.
- In your SQL window, the way you execute your SQL, press F5, it will open explain plan window, then follow step 2.
Following the steps will point to the Preferences window. Using the right arrow, select the required columns from “Available column” and move them to “Selected columns”.

After setting the required preferences:
Now you could see the required columns added to your explain plan.

Do I need to open different window all the time for checking explain plan for different SQLs?
No.
If you want to view the explain plan of another SQL in the same plan window and do not bother about losing the explain plan of previous query, then just copy paste the required query in the existing plan window and press F5. The new explain plan is for the SQL which you just pasted.
10. Setting up keyboard shortcuts
Go to, Tools –> Preferences –> Key configuration

Hope it helps!